
How to make multi-screenshot hero images with Shareshot and Shortcuts
At the time of writing, our app Shareshot will frame single shortcuts and add backgrounds, but we don’t yet support creating a single output image that contains multiple screenshots. We’re working towards support for this — and I promise you it’s going to be really nice when it’s done — but it’s going to take some time!
However, in the meantime using Shareshot’s own actions for Shortcuts you can create a custom workflow that will take three screenshots and create a single output “hero” image with three portrait iPhones or watches on it.
Before you continue: if you just need to put multiple images together in a row over a clear background, you should probably save yourself some time and use friend-of-Shareshot Federico Viticci’s Apple Frames Shortcut. This will do it for you out of the box, is free, and does not require Shareshot or messing with offset positions etc.
However if you want some of the other features of Shareshot like backgrounds and shadows, read on!
How it works
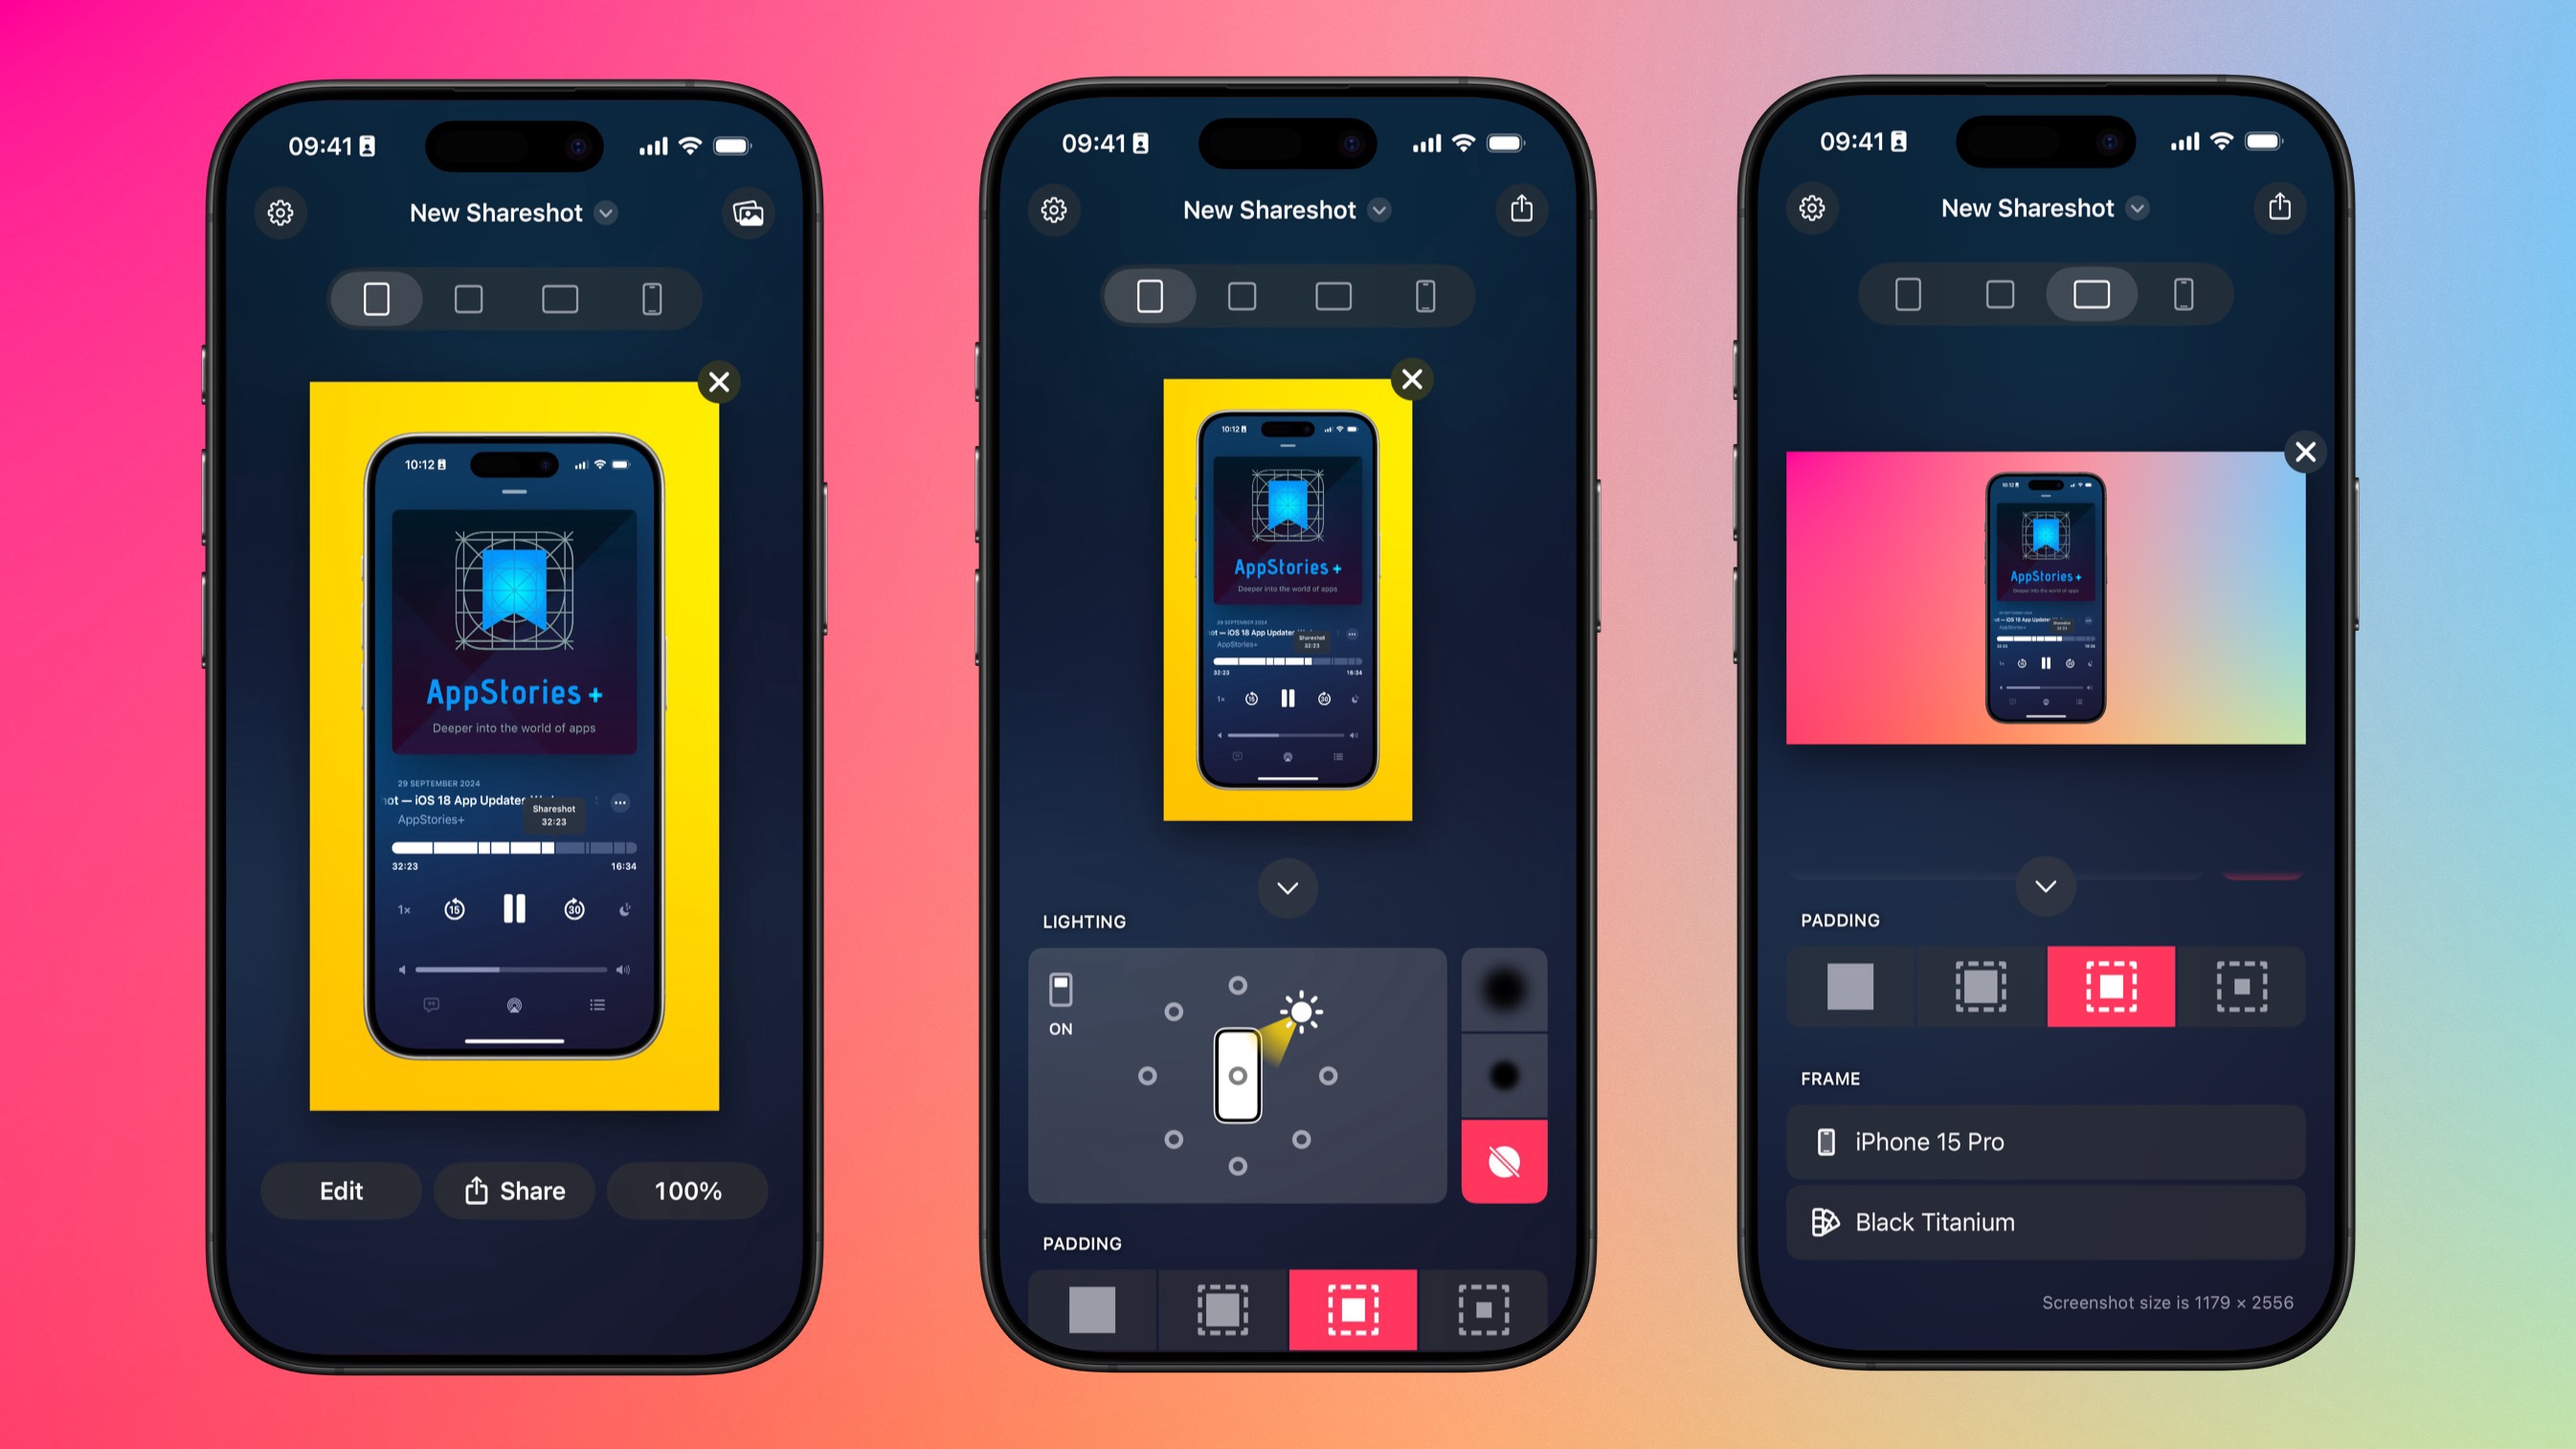
The idea is quite simple. We’ll have a Shortcut that lets you choose three screenshots, and then we’ll use one as the “primary” screenshot in a framed Landscape output from Shareshot using the “Frame screenshots” action it provides.
Frame the primary screenshot, which is actually the 2nd one…
We take the most recent 3 screenshots(†), which come in “newest-first” order. To make it easy to think about when taking or choosing the screenshots, we want to lay them out like a storyboard with the oldest on the left, the 2nd in the middle and the newest on the right, so it “reads” left to right.
So we grab the second one to use as the center screenshot, which we frame over a landscape background using Shareshot’s “Frame screenshots” action.
We can set any of the normal Shareshot options we want on the shortcut, to choose the background and so on. However with Landscape output, depending on the device screenshot size, you may find that you get errors if the memory requirements are too high. If this happens set the scale to 50% in the “Frame screenshots” action. Trust me, you probably didn’t want an image that is 5000px wide anyway!
†: Note that Shortcuts on iOS has a bug where it does not show the number of screenshots it will get from Photos. There is a -/+ stepper button and the display starts at “screenshot” and changes to “screenshots” when there is more than one, so you have to press it just enough times to get 3 🤦♂️
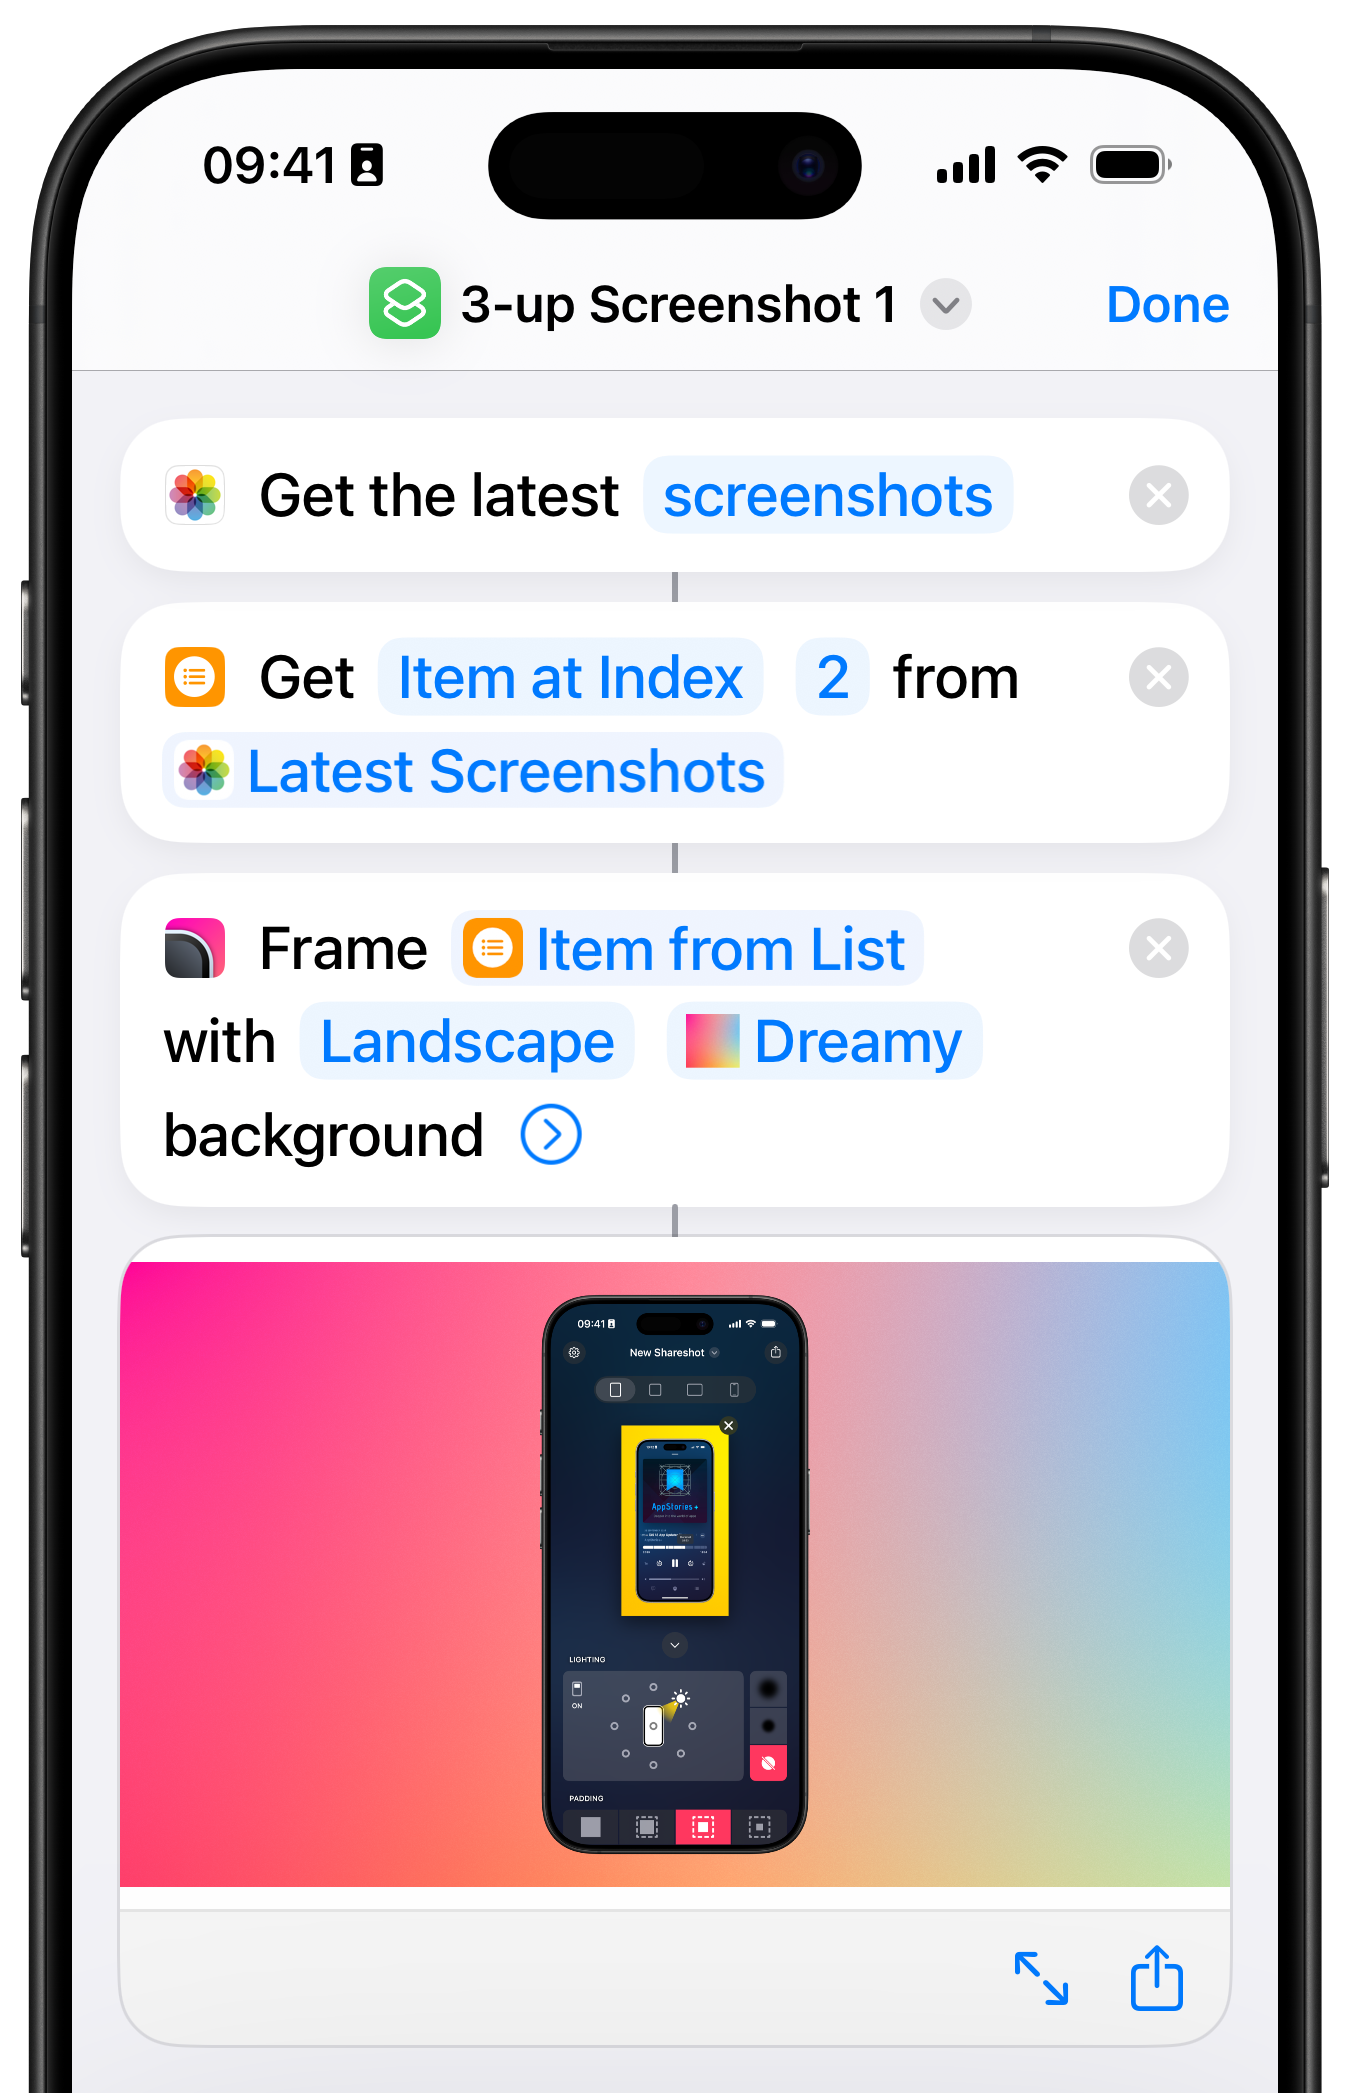
Frame the first one and put it to the left of the primary one
Now we have the primary screenshot and the background with a bunch of space to the sides, we can frame the two other screenshots over a clear background ready for positioning them to the left and right of the primary using the Shortcuts “Overlay” action.
For this we use Apple’s built-in Overlay action and set X and Y offsets to position the screenshots relative to the middle one (tapping the chevron on the Overlay action shows the options for this). You have to eyeball those or use an image editing app to look at them to check the output is lined up nicely.
For simplicity we’ve used values that look good enough for this use case. If you combine screenshots from different devices you’ll need to tweak these for each extra image to position it correctly.
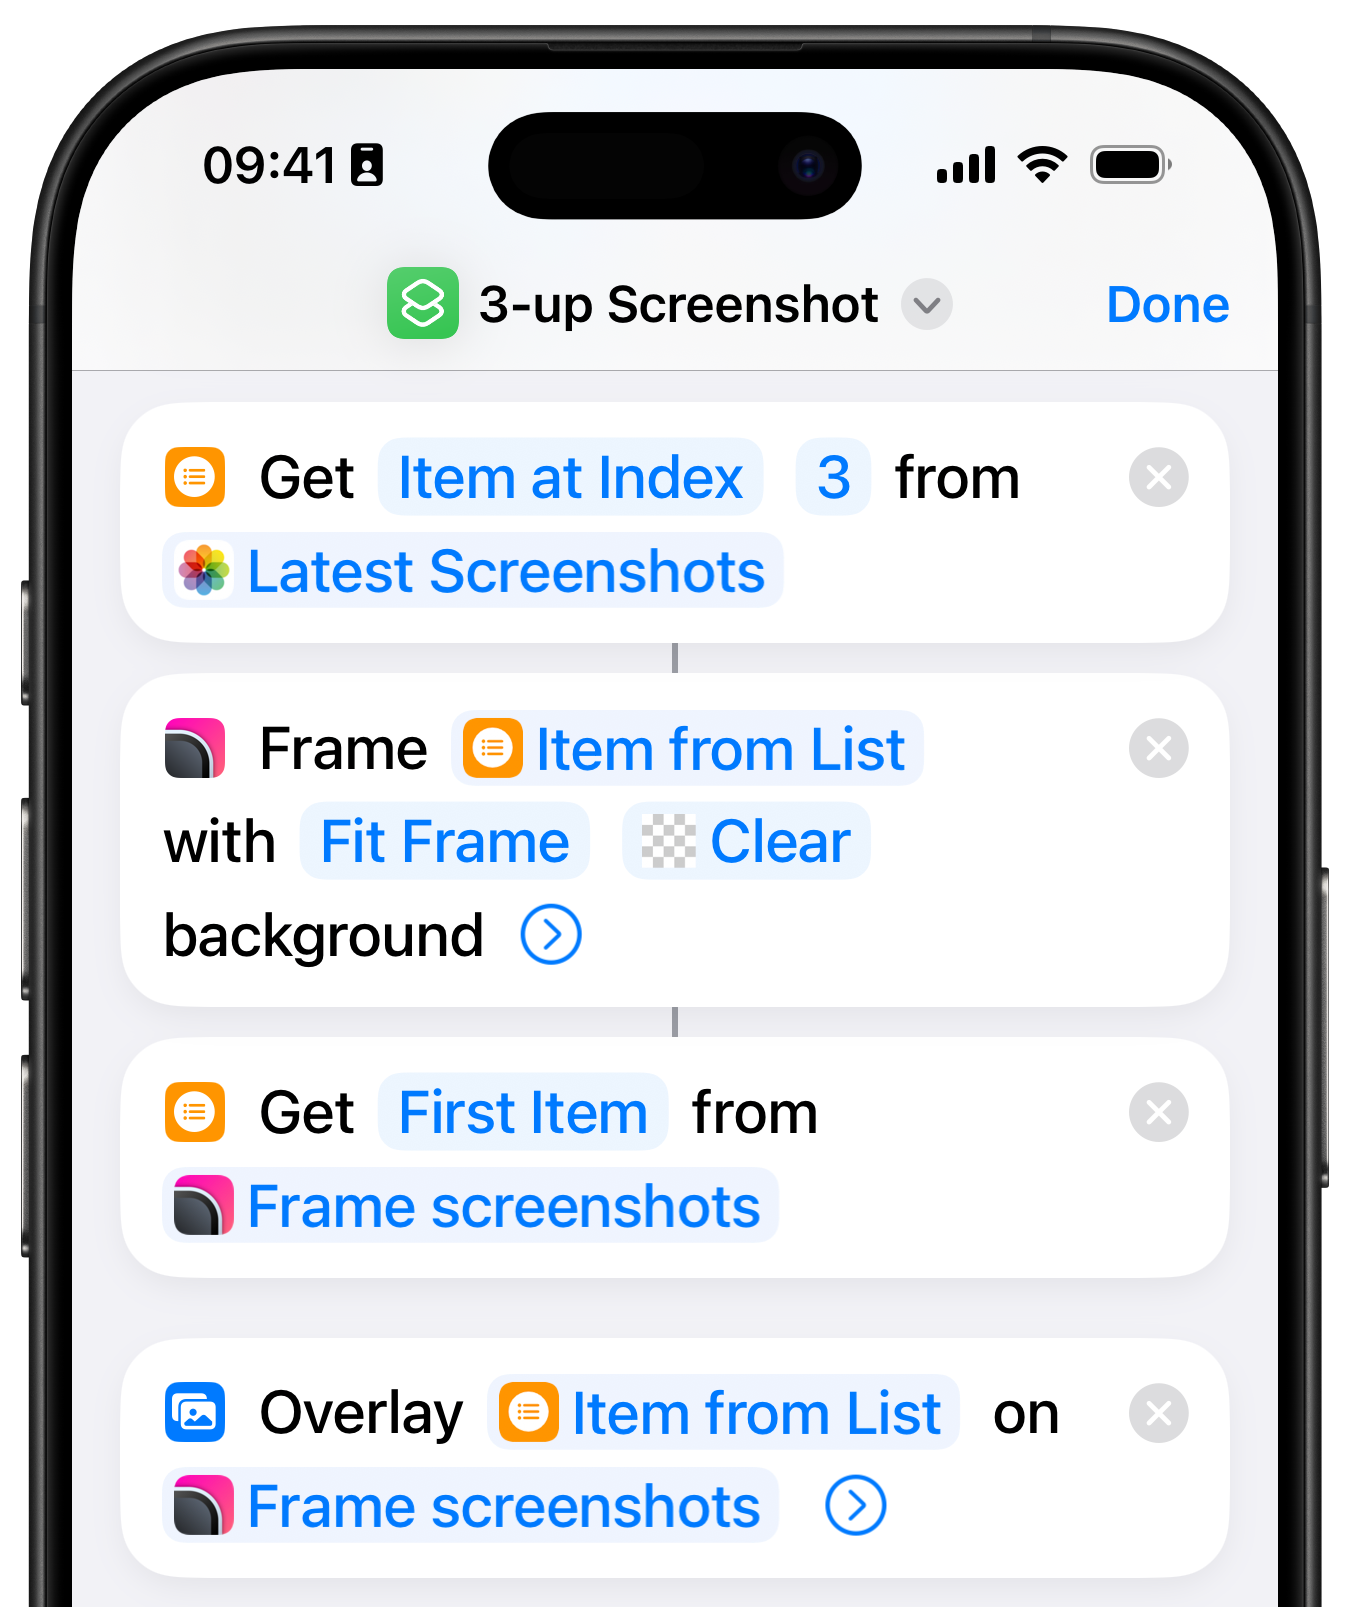
Next we do the same for image number 3, and put it on the right:
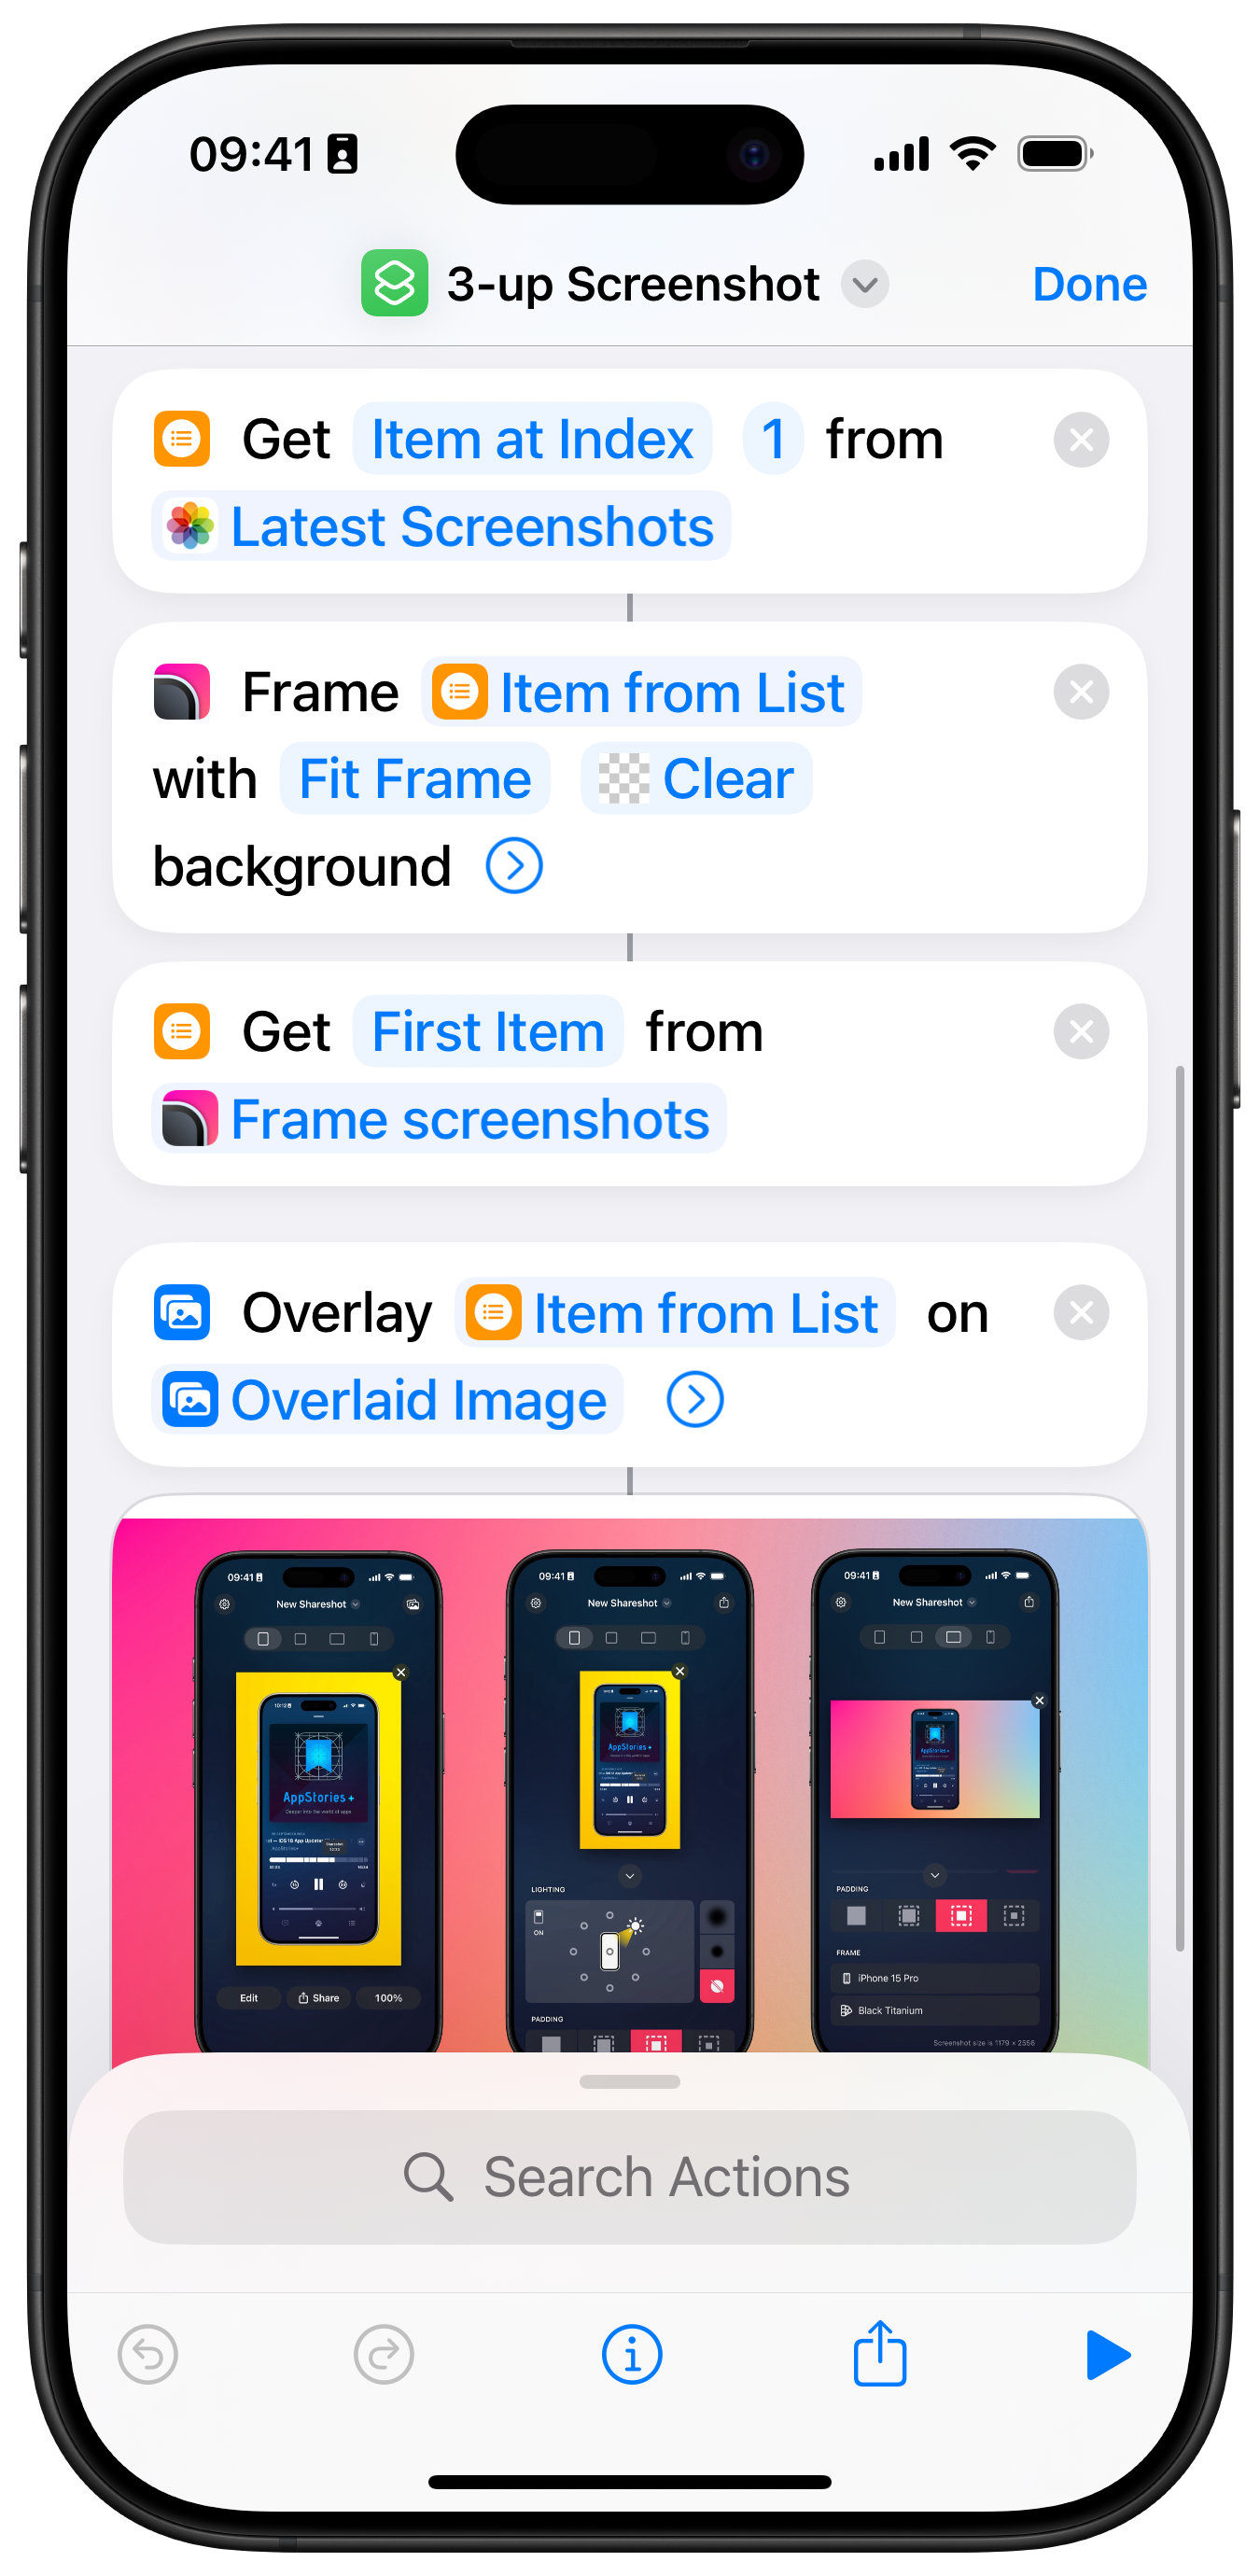
… we’re done! You can add actions at the end to then save, upload or otherwise share the resulting image, or even put a watermark on it etc.
Limitations
Think of this technique as creating your landscape canvas with one device centered, and you can lay out other framed devices around that.
However changes to padding and shadows in your primary screenshot’s framing parameters will mean changing the Overlay offsets you’ve used for the side images.
Also not that if you want to get the highest quality output, you should make your Shortcut export the result as a PNG. Converting to JPEG can result in banding and pixellation artefacts, which happens if you just share the last output step of the Shortcut using the share button in Shortcuts itself.
Thing to explore
You can actually use this technique for pretty much any composition of framed screenshots, so long as you have one in the center of the landscape image.
It’s possible to produce square outputs too, if you want to overlay other screenshots in front of the primary, say an iPad in the middle and a phone and watch overlapping at the sides.
If you want to go really wild you could automate some of the positioning of the extra images by running actions to frame them all (including primary) over clear with Fit Frame just to get the dimensions of the images and then calculate the overlay offsets based on that and the output size of the primary backgrounded image, to allow you to e.g. visually center them all even if different sizes or change the padding or primary device type without having to recalculate all your offsets by hand…
You could also probably produce a square image with two iPhone or two Apple Watch screenshots side by side by rendering to landscape and then cropping one side to square.
There’s plenty of scope for other fancy stuff like using Overlay to add your own logo, a cropped selfie… all manner of things are possible.
Download the sample Shortcut
The example shown here is available for you to download and experiment with. Note that this will only work on iOS, iPadOS or visionOS as there is no macOS version of Shareshot.
Download the 3-up Screenshot shortcut
